DDPM (Dell Display and Peripheral Manager) provides a unified experience for managing Dell monitors and peripherals. One of its most useful features is Easy Arrange, which gives you more control over how windows are positioned and resized on your screen.
DDPM already includes a variety of pre-defined layouts. But if none of them quite fit your workflow, you can create your own custom layout—and tailor it exactly the way you want.
Let’s walk through how to create and use a custom layout in Dell Easy Arrange.
Arrange windows the way you want
If you haven’t installed DDPM yet, download it from Dell’s official site and get it set up first.
Before you start, make sure DDPM recognizes your Dell monitor—otherwise, the Easy Arrange feature won’t be available.
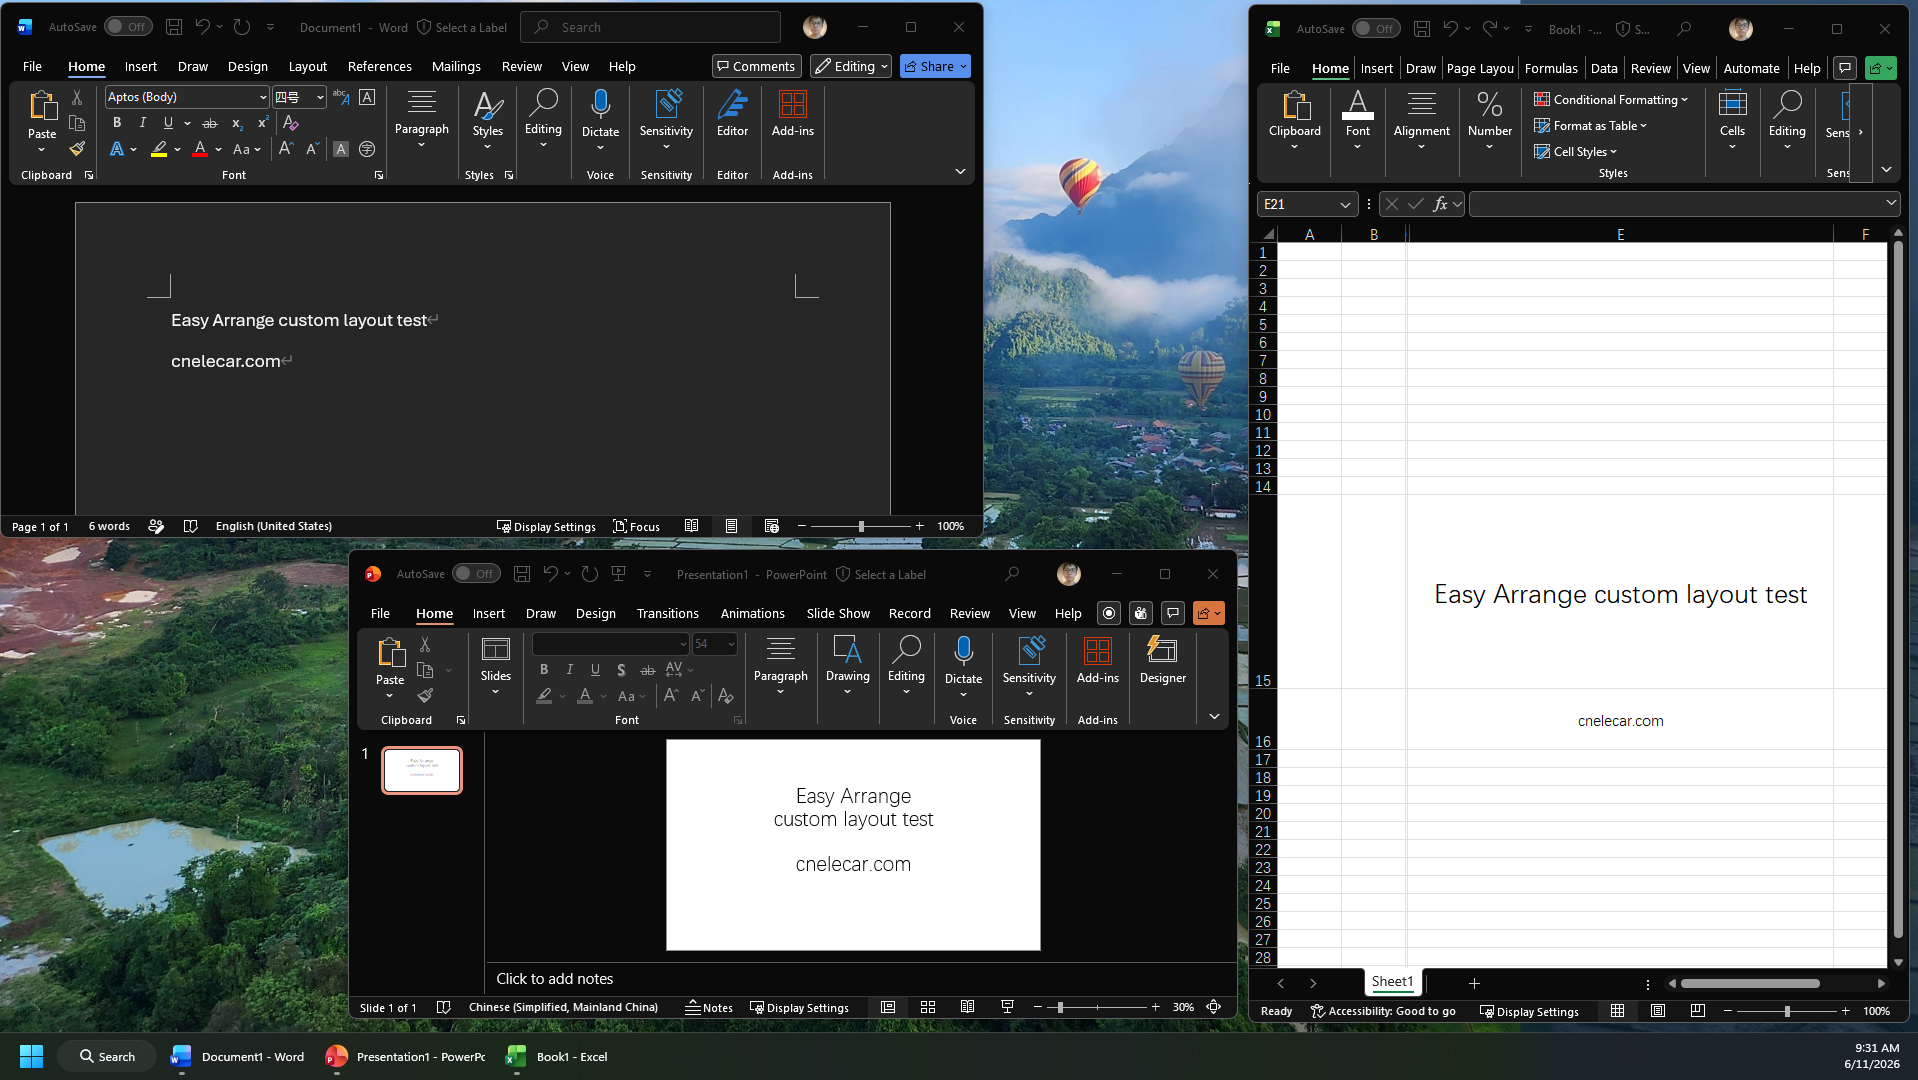
To create a custom layout, begin by manually arranging your windows exactly how you want them. This step is important because DDPM will capture and save this arrangement as your layout template.
You have full control here:
- Window positions
- Sizes
- Number of windows
It’s entirely up to your workflow—whether you want two evenly split panes or a more complex layout.
For example:
Save the custom layout profile
Once your windows are arranged, go back to the Display Management page in DDPM.
If you’re using multiple monitors, make sure you select the monitor where you created the layout.
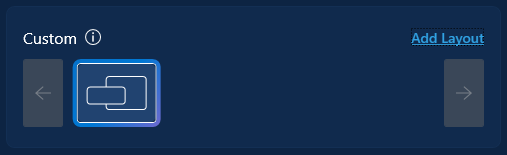
On the right side of the monitor preview, find the Easy Arrange section. Under the Custom category, you’ll see an option called Add Layout.
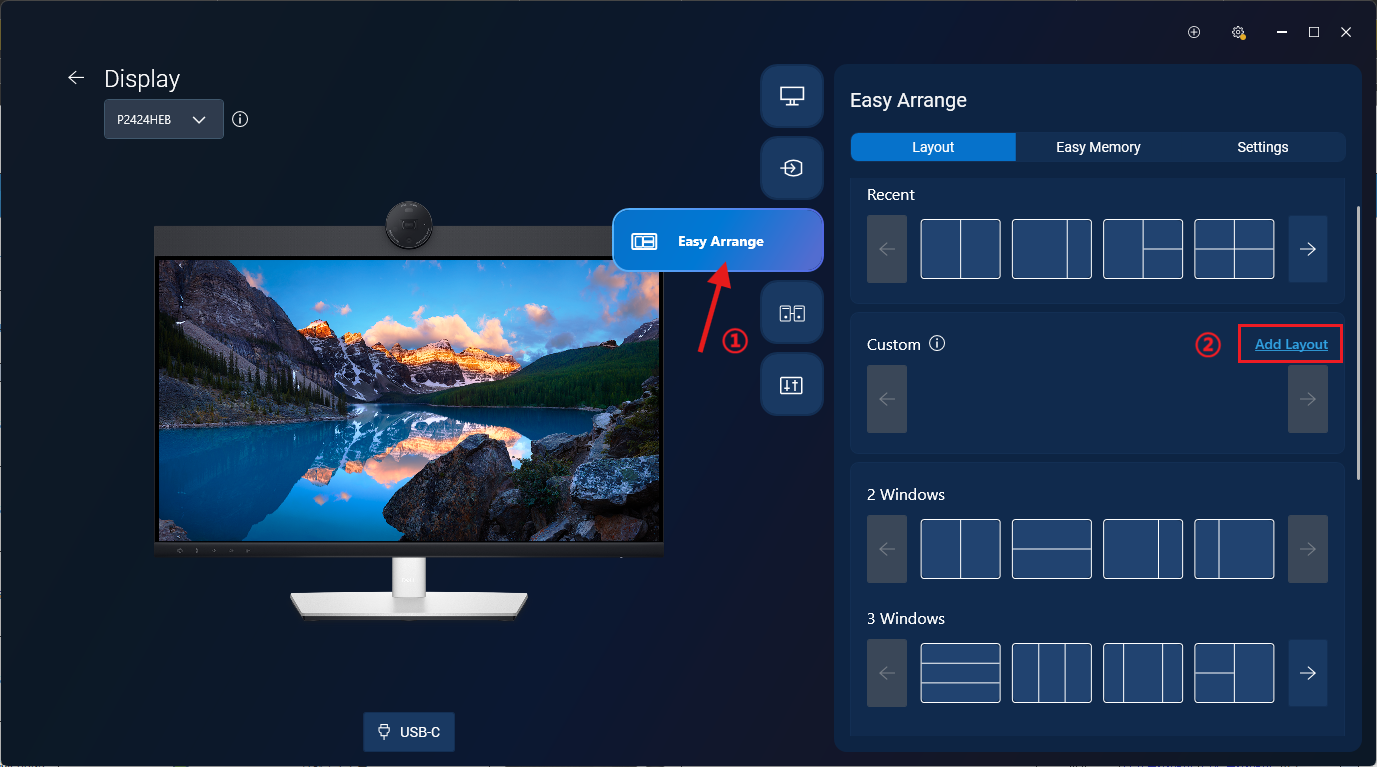
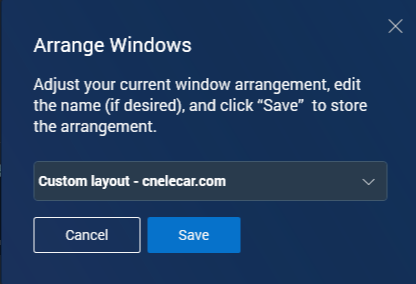
Click Add Layout, and a pop-up window will appear on the selected monitor. Give your custom layout a name (something meaningful helps later), then click Save.
Once saved, your new layout will appear under the Custom section.
At this point, your custom Easy Arrange layout is ready to use.
Use the custom layout
Using a custom layout works exactly the same way as using a pre-defined Easy Arrange layout—just click it, and it will be applied to your selected monitor.
Here’s a quick demo showing how the custom layout behaves in real use:
When you drag a window into one of the defined areas, the region will be highlighted. Once you release the window, it will snap into place and automatically resize to fit that zone.
If you drag a window into an area that wasn’t defined in your layout, nothing special happens—the window behaves as normal.
Whether you’re using a custom layout or one of the built-in layouts, you can always stop Easy Arrange by clicking Reset Layout in the Easy Arrange menu.

When it makes sense to use a custom layout
Custom layouts are especially helpful when:
- You regularly work with the same set of apps
- You need a very specific window arrangement (e.g., coding + browser + chat)
- Predefined layouts feel too limiting
Instead of repeatedly resizing and positioning windows, you can create your layout once and reuse it anytime.
FAQ
Q: How do I delete a custom layout?
Hover your mouse over the layout you want to remove. A ❌ icon will appear—click it to delete the layout.
Q: Can I use the same custom layout on other monitors?
Yes. Just switch to another monitor in DDPM and select the layout you want to apply.
Q: Is there a limit to how many custom layouts I can create?
Yes. You can create up to 5 custom layouts.
Q: Does Easy Arrange work without USB-C or a USB connection?
Yes. Easy Arrange works with monitors connected via DisplayPort or HDMI as well.
Q: Do I need to pay for DDPM?
No. DDPM is completely free and designed to help you manage Dell monitors and peripherals more efficiently. You can explore devices via Dell’s store if needed.